I had a terrible idea yesterday: why not wrap SDL in Carp and make a half-baked, low-res version of a tiny fraction of what Processing does? As with all terrible ideas I decided to give it a shot, and now I want to report back with my findings.
All the lines are straight around here
SDL’s 2D drawing capabilites are not that great, it’s basically just points, straight lines, and rectangles. That’s really not a problem, though, because if you’ve looked at my art works you’ll know that I have a whole collection of drawings that are just lines.
But of course that’s not nearly as powerful as Processing. I refused to give up, though, and instead implemented what I could with the meager means at hand. The result is anima, something that I describe as a drawing microframework, with an emphasis on micro rather than framework. It’s really just an exploration of what’s currently possible with Carp, and how ergonomic I can make the programming experience while minimizing both code size and magical API voodoo.
(load "anima.carp")
(use Anima)

(defn setup [app rend]
  ; shortcut for a static sketch
  (framerate 0))

(defn draw [app rend]
  (do
    (color app rend 255)
    (line app rend 0 0 800 800)))

(defsketch "One line to rule them all" 800 800
  setup
  draw)
Fig. 1: An example anima program, stolen from the README.
As visible above, the API is somewhat similar to Processing, with a
few tweaks1. For one, we set up sketches
with defsketch, where we provide a name, width, height, a
draw function that will be called for every frame, and an optional setup
function to start things.
Both of these functions get an SDL application and an SDL renderer to
work with, and most anima functions require these as the first two
arguments. The example above is a static sketch, and as such its
framerate is set to 0 in the setup function. The draw
function sets the stroke color to white—color behaves
similarly to stroke in Processing—, and draws a line. We
could also set the color in the setup function, but I often like to have
setting the color and doing the stroke as close together as possible,
because this makes it easier to see which stroke is in which color.
Simple enough, isn’t it?
I want to talk a bit more about the API—which, as always, is subject to change and will probably break under scrutiny—and then we can try drawing something together!
Simplicity is Godliness
Just how micro is anima? It’s less than 100 lines of code, and exposes just nine functions. We’ve seen a few of them, and some we have yet to explore. This is going to be a very quick overview before we dive into an example.
The entry point for any sketch is defsketch. Here we
define the meta information about the sketch and which functions to
call.
If we need to set things up, it will probably be the framerate,
color, and background, which we set with the functions
framerate, which does not take the application or renderer
as parameters, and background and color, which
do. The latter two are also variadic, meaning that they either take one,
three, or four arguments, app and renderer not considered. One argument
means that we want to set the color to a gray-scale value with full
opacity, three mean any color with full opacity, and the fourth
parameter sets the opacity. If you want to define your colors in HSB,
you can convert an HSB value into RGB using hsb-to-rgb,
which takes any three HSB values from 0 to 1 as floats, and will return
a three-element array of the corresponding RGB colors.
(defsketch name width height setup draw)

(framerate frames-per-sec)

(background app renderer greyscale)
(background app renderer red green blue)
(background app renderer red green blue opacity)
(color app renderer greyscale)
(color app renderer red green blue)
(color app renderer red green blue opacity)

(line app renderer start-x start-y end-x end-y)
(rect app renderer start-x start-y width height)

(random upper-bound)
(random-between lower-bound upper-bound)For drawing we only have line and rect for
now. We’ve seen line in action above, and rect
is very similar: it takes a starting point as x and y coordinates, and a
width and height. That’s all there is to drawing!
For our randomisation needs we have random, which takes
one argument that is the upper bound of the random value, and
random-between, which has both an upper and a lower
bound.
That’s the whole API! Can something that simple, even primitive, create interesting pictures? Let’s try it out!
I’ve got lines and lines
When I was ready to take anima for its first test drive, I immediately looked through the back log of pictures that I had produced for suitable candidates. I found a few that I was able to reproduce, showcasing that, while anima isn’t a fully-fledged framework for animation, it’s also not completely useless.
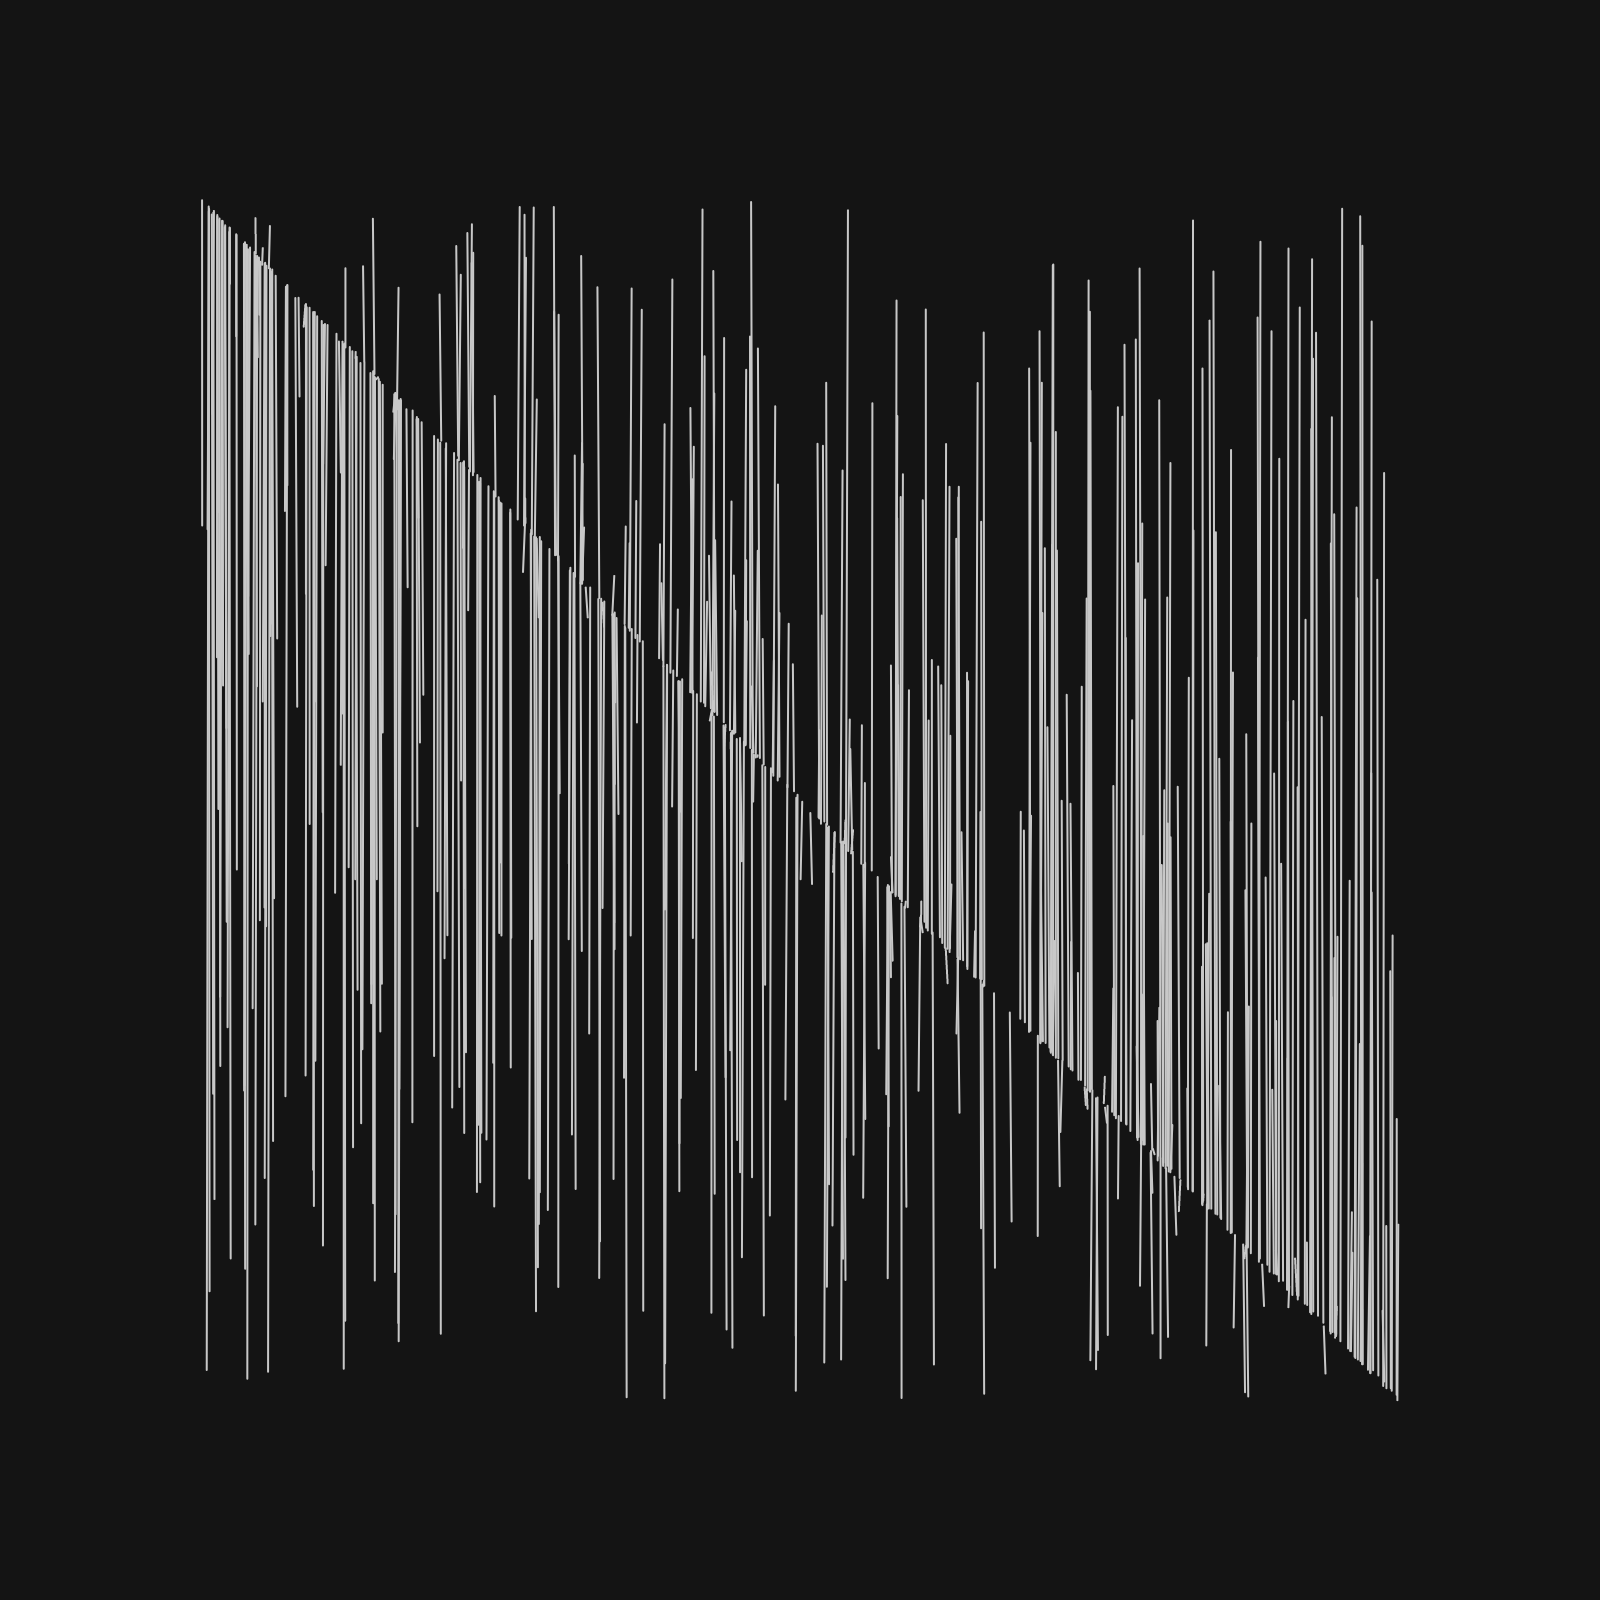
The piece above is interesting because it happened completely by accident, but I liked it enough to keep it. It’s incredibly simple, and still nice to look at. Let’s try to recreate it2! We’re going to start with a little skeleton that just sets up an empty application:
(load "anima.carp")
(use Anima)

(def size 800)

(defn setup [app rend] ())

(defn draw [app rend] ())

(defsketch "Whispering Drink" size size
  setup
draw)All we’re doing for now is defining a sketch with an empty setup and draw function and a size of 800 by 800 pixels.
This sketch is already executable! Running
carp -x <name-of-the-file> will open a pitch-black
window that is the size we specified and wait for us to close it again.
Not very interesting yet, but it’s a start, just like a blank
canvas.
Alright, let’s get setup out of the way! This sketch is
supposed to cycle through the picture once a second, so we limit the
framerate to that. Because we have to redraw the background to clean out
the old frame we will not put our call to background in the
setup function.
(defn setup [app rend] (framerate 1))Now that we’ve got the setup out of the way, let’s take care of
draw. For now, let’s set the background and stroke color
there and leave it at that.
(defn draw [app rend]
  (do
    (background app rend 20)
(color app rend 200)))All of the iterations of the sketch thus far have been executable, and all of them have looked and felt almost the same. Let’s try and figure out how to actually draw things. The line effect in the picture above is achieved by drawing a lot of random lines, with a random start point and an endpoint based on one of the start point’s coordinates, in this case the X coordinate. We can try to draw one such line first:
(defn draw [app rend]
  (do
    (background app rend 20)
    (color app rend 200)
    (let [x (random size)
          y (random size)]
(line app rend x y x x))))This looks more like it! So what are we doing here? We get a random
point by obtaining two random values between 0 and size,
one for each coordinate. Then we draw a line that goes from the point
[x, y] to [x, x]. Running this will result in
one line displayed per frame.
That’s kind of nice, but what about a whole bunch of lines?
(defn draw [app rend]
  (do
    (background app rend 20)
    (color app rend 200)
    (for [i 0 200]
      (let [x (random size)
            y (random size)]
(line app rend x y x x)))))We’re almost there. We get one artwork per second, but they don’t
look quite right. Letting the lines start anywhere overcrowds the
picture, and one of the nice parts of the piece in Figure 2 is its
margin. Negative space lets the whole composition breathe a little more.
Let’s limit x and y a bit.
(def margin 100)

(defn draw [app rend]
  (do
    (background app rend 20)
    (color app rend 200)
    (for [i 0 200]
      (let [x (random-between margin (- size margin))
            y (random-between margin (- size margin))]
(line app rend x y x x)))))We introduce another global constant, margin, to
constrain the X and Y coordinates. For that we use
random-between instead of random, making the whole
let business a little less intuitive, but still fairly
readable.
And there you have it! That’s all the code we need to create a simple picture that looks like the cover artwork of a techno 12’ you found while digging in a dimly-lit record store in Berlin.
Fin
I hope I will find the time and energy to continue working on anima, because it’s a fun little project and I could certainly see myself using it again in the future.
Constraint isn’t always bad. Sometimes it’s exactly what I need to be productive, but I talked about my fetish for minimalism before.
I also certainly hope that you enjoyed getting a little insight into how I create the little riffs that I sometimes grandiosly call “art”. I know I enjoy talking about the creative process, so if you’d like to hear about it more in the future, holler at me!
Footnotes
1. I have an inkling that its API is also very similar to Quil, but I cannot remember its conventions from the brief period I spent with it a few years ago and am too afraid to look.
2. To be able to follow along, you’ll have to
have Carp installed—read how to install it here—
and have downloaded anima. This is as simple as cloning the Git
repository. The code I show you in this blog post assumes that the file
anima.carp, which is part of the repository, is in the same
directory as the code we’re going to write.